Connecting Marquis IQ to Excel
Query your Marquis IQ data directly in Excel using a live Azure SQL connection. Follow the steps below. Setup takes about 3 minutes.
- A Marquis IQ login (Microsoft account). If you don't have one, email support@marquisdata.com.
- An Excel template file, available in Files → Excel Templates inside Marquis IQ.
Marquis IQ's database only accepts connections from known IP addresses. Do this once each time you connect from a new location.
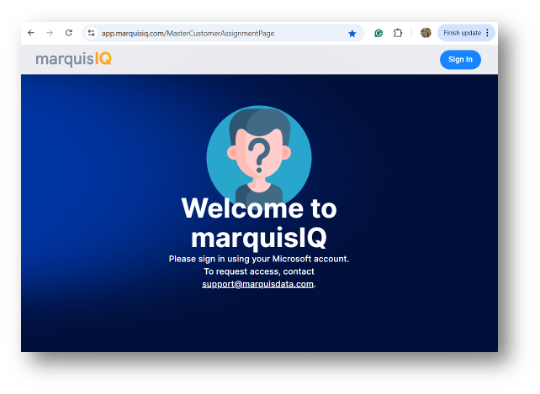
Go to app.marquisiq.com and click Sign In in the top-right corner. Use your company's network account when prompted.
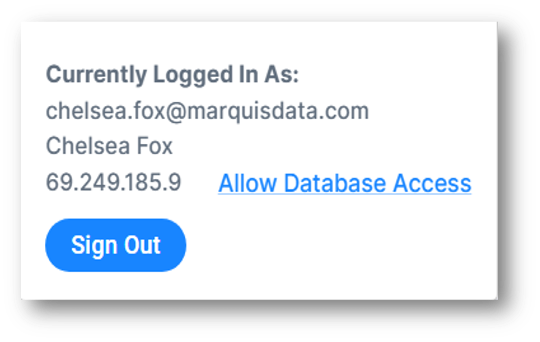
Click the initials avatar in the top-right corner (e.g., PD). The User Menu shows your name, email, and current IP address.
Click the blue Allow Database Access link next to your IP address. A confirmation banner appears. Your IP is now whitelisted.
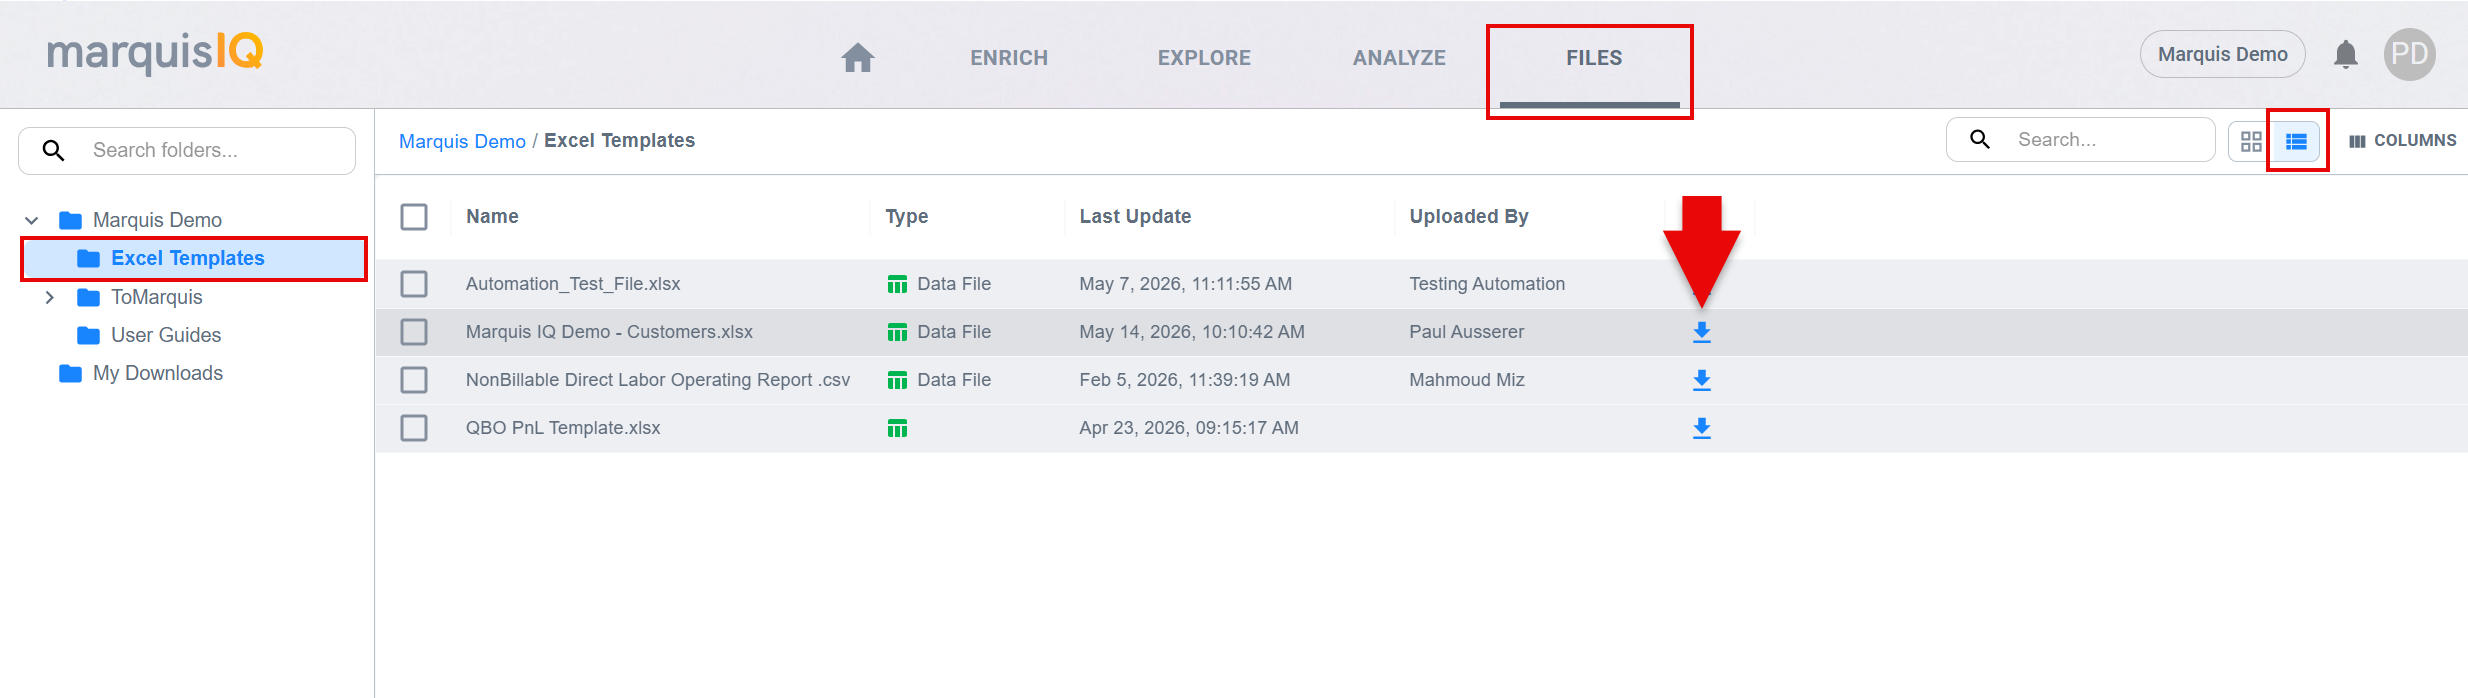
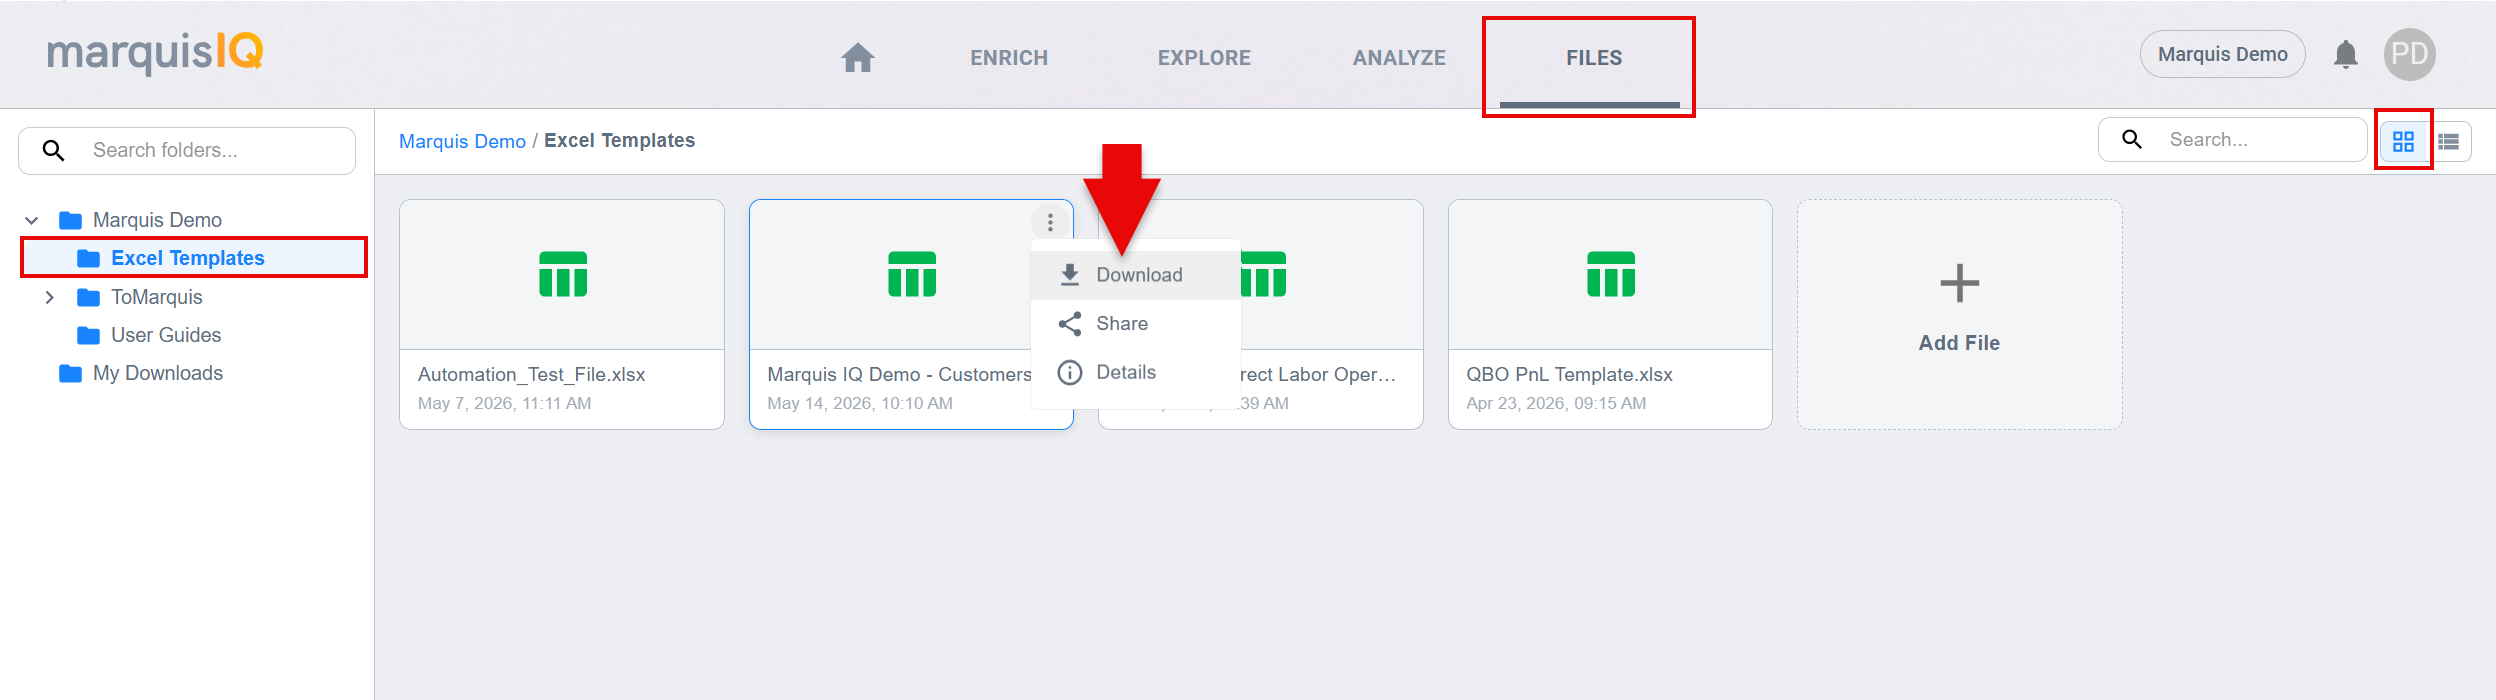
In Marquis IQ, click the FILES tab in the App Bar. Open the Excel Templates folder and click the file you want to download. The folder may appear in either List or Grid mode depending on your settings.
Excel opens the file in Protected View. Click Enable Editing in the yellow bar at the top to allow the data connection to work.
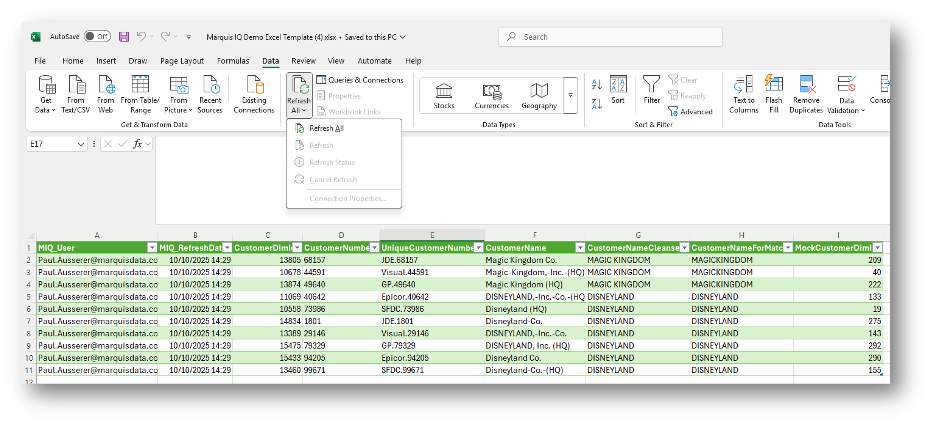
In Excel, click the Data tab in the ribbon, then click Refresh All.
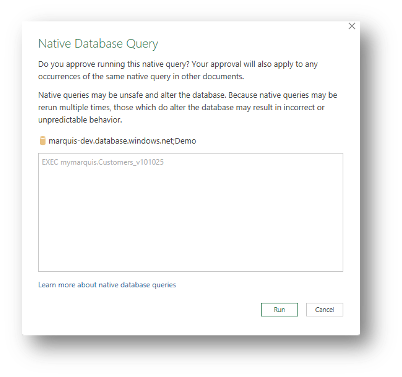
A Native Database Query dialog appears. This is expected. The template runs a pre-built Marquis IQ stored procedure. Click Run.
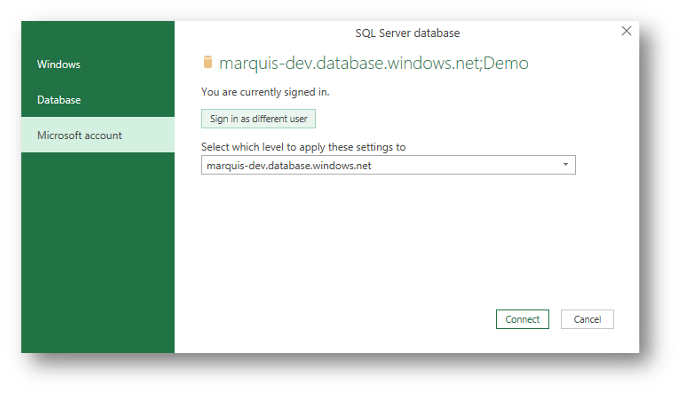
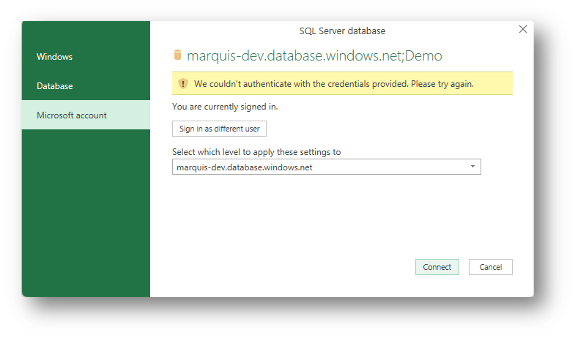
In the SQL Server database dialog, click Microsoft account in the left panel, then click Sign in. Select your Marquis IQ work email from the account picker.

After signing in, the dialog shows "You are currently signed in." Click Connect. Excel loads your live Marquis IQ data.
Troubleshooting
Clearing Your Data Source Settings
If you have persistent connection issues (wrong account cached, credential mismatch), clearing stored data source settings usually resolves it.
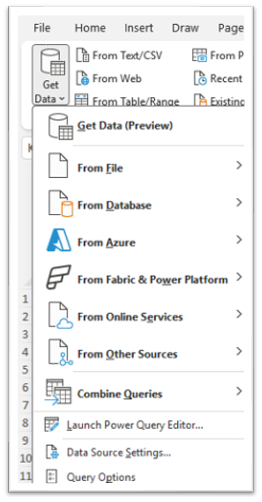
In Excel, click the Data tab. Click Get Data on the far left. At the bottom of the menu, select Data Source Settings…
Under Global permissions, select any entry ending in iq.database.windows.net. Click Clear Permissions. Repeat for any other Marquis entries listed.
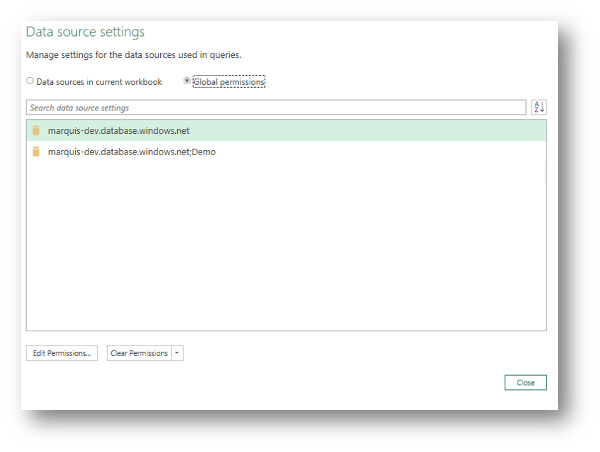
Click Close, then return to Data → Refresh All and follow Phase 3 to reconnect from scratch.
Common Errors
Cause: Your current IP has not been whitelisted on the Marquis IQ Azure SQL firewall.
Fix: Follow Phase 1: Whitelist Your IP Address. Changes take up to 5 minutes to propagate.
Cause: A Microsoft account cached in Excel doesn't match the authorized Marquis IQ account, or credentials have expired.
Fix: Clear your data source settings, then go through Phase 3 again and select the correct account.
Cause: The Microsoft account selected hasn't been granted access to the Marquis Data Azure tenant. Common when multiple accounts are signed in at once.
Fix: In the account picker, select your company's network account. If none of the listed accounts work, contact support@marquisdata.com to have your access provisioned.

Need Help?
The Marquis team is ready to help with connection issues, account access, and Excel template questions.